Hello Knitting! (this isn’t goodbye crochet)

Crochet VS Knitting …. You chose one or the other, right? I think most of us do. My Mom is a knitter. I am a crocheter. But… my grandmother was both! She knit socks and mittens right through her last years. Everyone in the family loved getting Nana socks.

009nov15

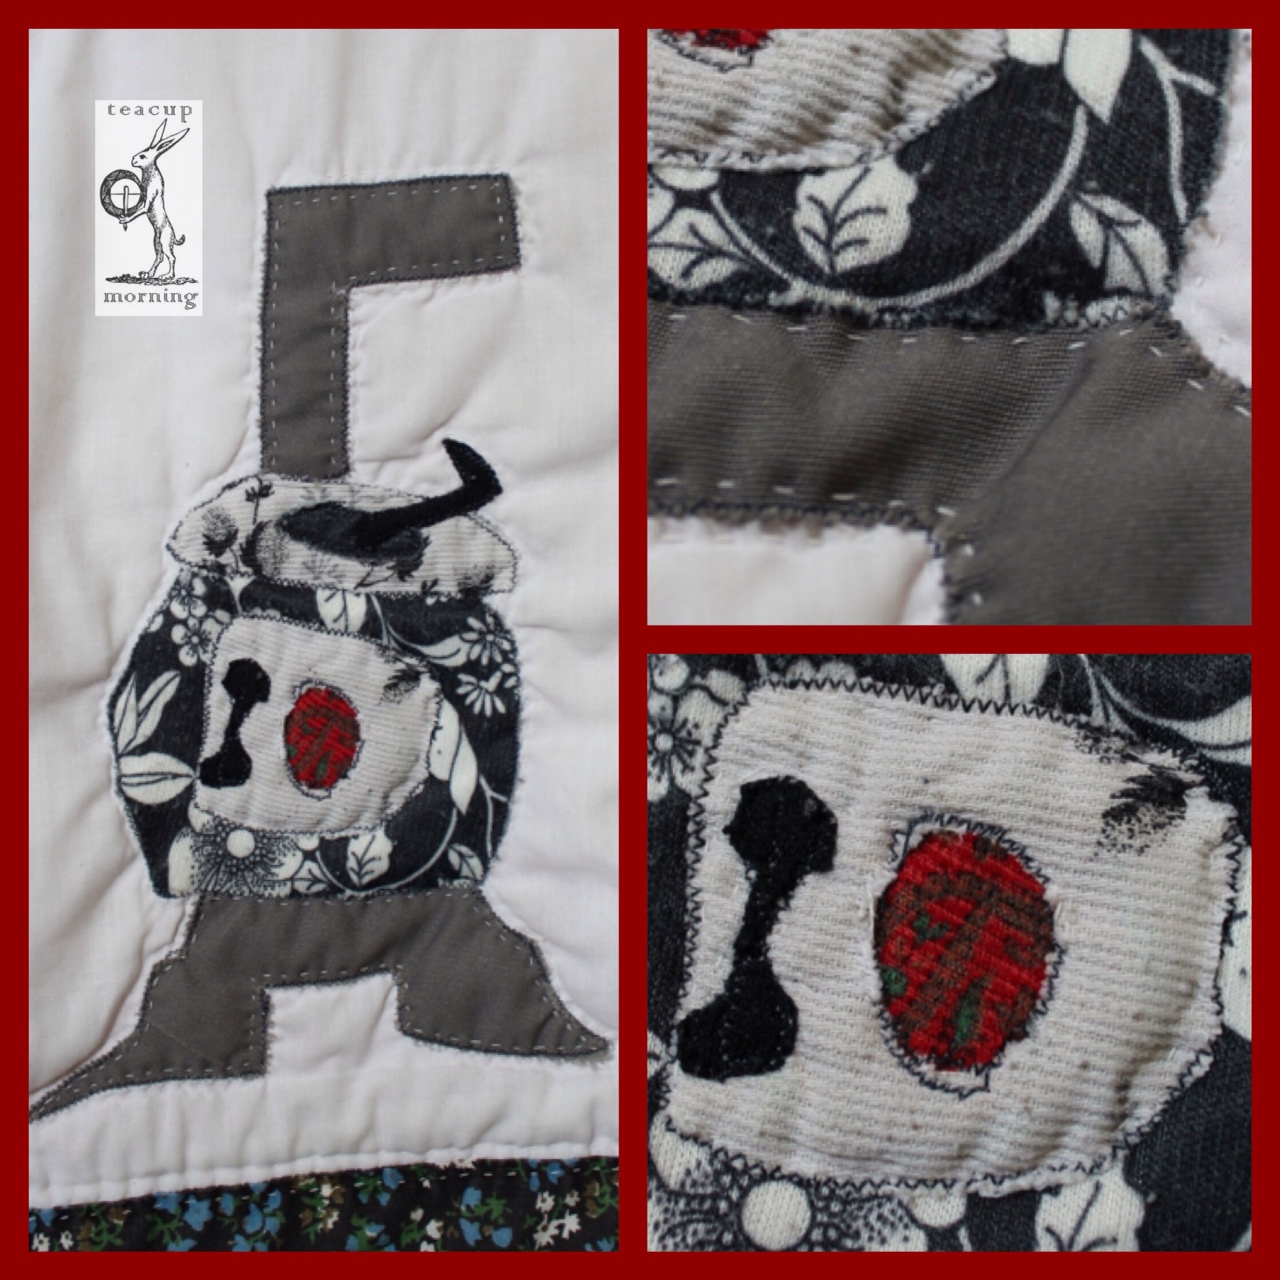
She also crocheted sweet baby outfits. I have no doubt she was making these back in the sixties when my Mother started her family and she continued to make them right up until my son was born.  What a lovely pattern. There is a hat and booties, too. I feel so lucky that I have several of these sets that I will get to pass on to my own grandchildren someday.

008nov15

When I decided to learn how to crochet, I was expecting my son and wanted to make him things. My girlfriend and I decided to take a class on a Friday night and I was hooked. (pardon the pun) I have grown a lot in my abilities and have made some really fun projects over the years. I was feeling just fine about it until my Mom through a monkey wrench into things and gave me her collection of knitting needles.

001nov15

She was moving into a new condo at the time so she was getting rid of stuff.  I said to her, “Welllll  … I will take them and hold onto them for you. You can get them back any time you like.”

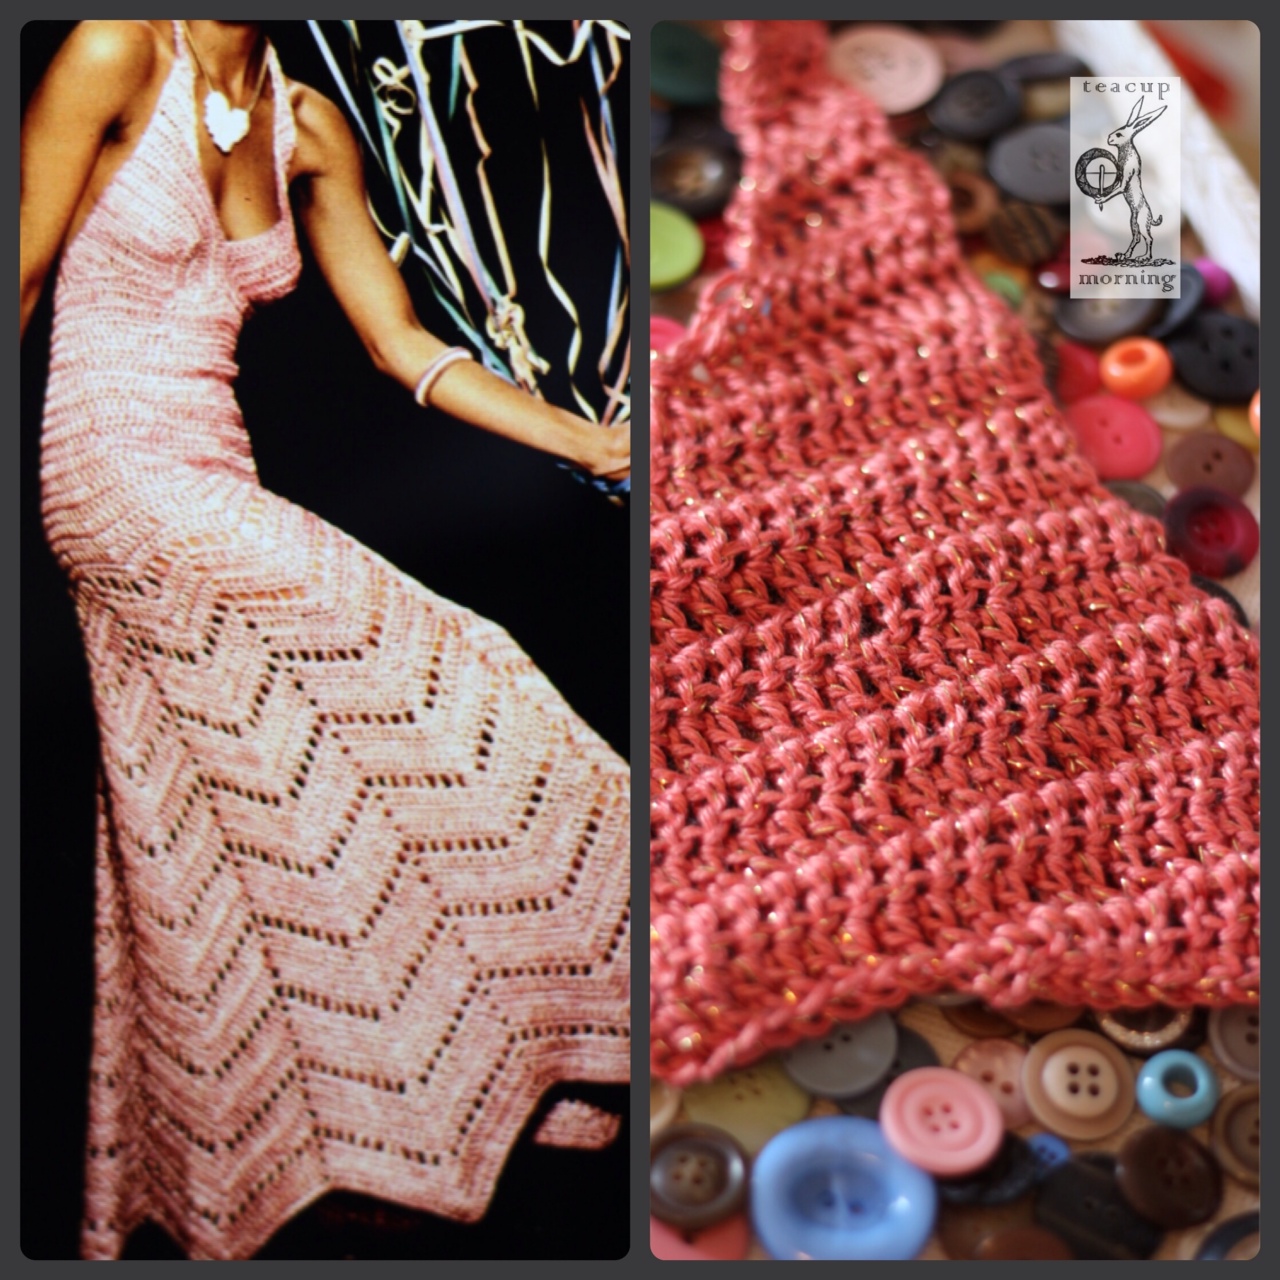
My Mom is an amazing knitter. She makes things like this hooded sweater:

002nov15003nov15004nov15

I know, right? I grew up with her knitting Lopi Sweaters in Aran wools in Nova Scotia.

Gorgeous. Intimidating. I have her knitting needles.

Every time I went into my sewing room, there they were. So many of them. Small, medium, large; short, tall, aluminium in pretty colours, pearly plastic ones – they were enticing. I started having flashbacks of learning how to knit 1 purl 1.

At the time, I was fiddling around with the super tiny crochet hook to make lacey things.

006nov15

When it was time to block the snowflake I just made, I came up with an excuse to not do the blocking; I have to pick up those wooden knitting needles and see if I can remember how to cast-on.

It’s amazing how it all comes back to you when you have those needles in your hands. I have seen the knitting on Etsy. So many beautiful big cowls with that signature “knitted” look you can only get if you learn how to Tunisian Crochet. I don’t know how to do a Tunisian crochet stitch. But I know how to knit 1 purl 1. So, I gave it a whirl.

005nov15


This is actually knit 1 row, purl 1 row. Fun! For some reason, picking up the knitting needles has made me want to try super chunky knitting and crochet. Maybe it’s a re-bound from the teeny, lacey stuff I have been crocheting. The biggest needles in my Mom’s collection are 10 mm, which is nice and big. But they come bigger. #christmaslist

I went out and found an S hook so I can crochet chunky cowls.

007nov15


And that’s not even the smallest hook I have.

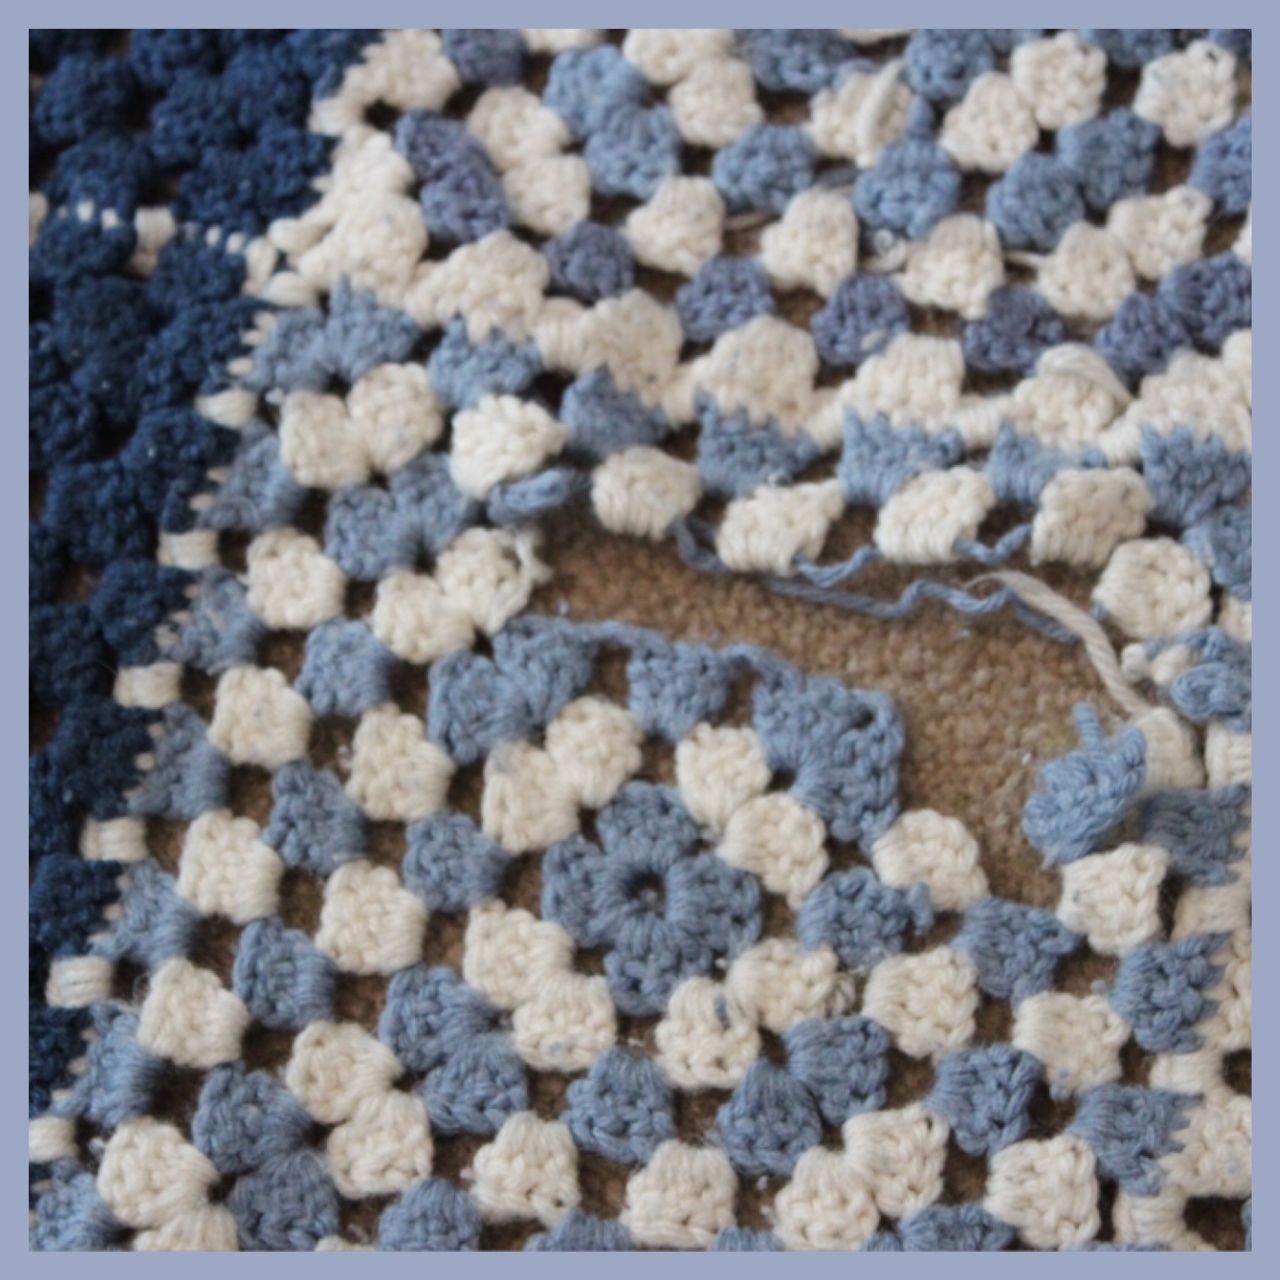
So, I am not only growing my skill set, and the size of my tools, but my pile of WIPs, too….

i n t e r e s t i n g  f a c t

Did you know some of the earliest knitted socks were from Egypt?

http://blog.berroco.com/2013/09/24/emily-explains-some-fun-knitting-facts/

Circa 1977 Quilt

There was a time when something I enjoyed in my lifetime would never have been considered vintage. And then there’s now. Although I am only 40-something, (Gack! Am I 40-something???)  some things from my past are now falling into the vintage category. My daughter is interested in my old photos and what I wore in the ’80s. #worstfashiondecade 

But it is the ’70s I wanted to share with you in this post. In 1977 my quilter Mother and her friends and family worked on a friendship quilt. That was a time in the quilting world where the ladies got together and sat around the quilt on a frame and quilted each stitch by hand. Each lady made a square and they put it together into a wonderful keepsake to be enjoyed for decades to come. My Mother was 30-something then and I was a little girl playing underneath the quilt frame as if it were a fort. This particular quilt, made in 1977, moved around with us as a military family and only a few years ago, she passed it on to me. (I was in my 30’s then; ha ha) We enjoy it in this family, just as my Mother’s family did. It’s on my bed in the winter months and my 16 year old son takes it down to his the basement and sleeps under it in between NHL Hockey sessions on the xBox all summer.

The quilt has such creative squares and fabrics that I absolutely love paired together. My Nana made a square, which I think is my favourite one. Because I loved her so. And I miss her now. (sniff)

Here is the quilt in all its glory, including a close-up of some of those sweet fabrics.

Image

You can see the detail of the hand-stitching in the photos below. Doesn’t it make you want to do a whole quilt by hand?

Image


Below are two squares that are so pretty and unique. Some of the quilters left their signature or an initial. The image next to each square shows a close-up of the embroidery details.

Image


I love, love, love this wood-burning stove! So quirky and charming! It makes me think of the wood-burning stove we had in our heritage home in Nova Scotia. 

Image


I would love to share each and every square, but that would be a very looooong post, so here is the last, but not least – my Nana’s square. She managed to embroider that “Mom” in her recognizable hand-writing. I cherish it.

Image


Although in the 2000’s we have somewhat gotten away from the ways of the past with Sunday morning church, quilting bees, afternoon teas and weekend card games with neighbours, I am happy to see that the internet has brought quilters together from far and wide. Online quilting bees and challenges, guilds that are buzzing with activity – they all help in keeping the rich craft of quilting alive.

Thanks for spending some time with me! Until next time…. 

* i n t e r e s t i n g  f a c t *

“During the crusades, warriors from England and Scotland noticed the leather quilted garments worn by Islamic warriors under their chain mail, or as armour itself. Even the horses of the Islamic armies had their own quilted garments. It wasn’t long before worried wives of warriors from England and Scotland began protecting their husbands with some extra layers of quilted cloth as well.”

cited: http://www.funtrivia.com

Butt’ry Vintage Baking

When my Mom gave me this old recipe book, I opened it up to the Table of Contents to see what sorts of vintage recipes (with gobs of butt’r) I may want to try. (Note the title of this recipe book…)

buttry1

I was pleasantly surprised to see they were categorized, not by types of baking or courses of meals, but by occasion. “Picnic by the River” or “Breakfast under the Apple Tree” How quaint!  One stood out to me the most: “Thimble Tea and the Quilting Bee.” Story of my life! Well, not exactly, but I did have thimble teas and quilting bees in my childhood. Quite a few of them. I could actually relate to the two little girls playing under the quilt in this lovely illustration.

buttry2

I decided on the banana bread recipe from the Quilting Bee section. We are a gluten free family and I had just purchased a new flour that claimed to be “cup for cup replacement.” So, I followed the recipe, replacing regular flour with the “Cloud 9” GF flour.

buttry3

Please behold (and forgive me) the gratuitous showing off of my Kitchen-Aid Mixer. I adore my mixer. Not only does it mix for me, but it whisks, grates, slices, dices and even makes ice cream! Even.Makes.Ice.Cream.

buttry4

Even though the book is vintage, I’m not comfortable with publishing the recipe. I encourage you to shop second hand and find a vintage recipe book and try the banana bread recipe!

All in all, the GF flour was an excellent replacement. I had to bake it longer than the recipe called for, but that is typical of GF baking. It has taken me several years to really get used to baking gluten free. Tip: if you haven’t already, get your hands on this book: (I was not paid to say that) 

image (17)

* i n t e r e s t i n g  f a c t  s i t e*

No fact this time …. but I suggest you visit this site if vintage cookbooks interest you. Until next time, friends! (hint, hint….next post is about a vintage quilt 🙂 🙂 🙂  I know, right?!)

Until my dyeing day

Last winter my Mom said, “I want to dye fabric this summer.” Now, you have to know…. When my Mother gets on to something, she means it. She proceeded to spend the rest of the winter (in between all of her other projects) reading every book on fabric dyeing she could find.  One fine Spring day she called me up, “So, I have been reading a lot of books about dyeing.” I said, “Mom! Why are you reading about dying? I don’t think that’s a very good idea.” After she stopped laughing for an uncomfortably long time, she said, “No! FABRIC dyeing!” #awk-werd

She ordered special dyes and fabrics online and all the chemicals and water softeners we would need. When the weather got nice, we started some dyeing projects. First, it was “sun-dyeing.” Here is how it turned out……

image (21)

We soaked the fabric in soda ash, then painted with her special fabric paints. We chose some decorative items to place on top of the fabric and left them out in the sun. (If you’re going to do this, I suggest using items that sit quite flat to the fabric and leave out in the sun for at least a couple of hours.)

Our next mission was marble dyeing. This required not knowing how hard it was going to be ahead of time  special marbling paints, building a frame  and using chemicals for the water to make the paint sit on top. This process was very difficult and just as we were giving up on it, we gave it one last go and sure enough – it worked! When I showed my hippie hubby, he had one word: psychedelic

image (20)

Our latest adventure was ice-dyeing. This crazy venture required scrunching up your fabric, piling it high with ice cubes and sprinkling paints on top of the ice. As it melts, the paints do crazy things. Totally unexpected things. But that’s the fun of dyeing fabric. It’s kinda lak a box ‘o chocolates …. (use Forrest Gump’s voice here) Ya neva know whatcha gonna get.

Well, here’s what we got…..

image (17)

You can see in this photo above that the fabric took on that mesh design from the screen we had it sitting on. I love how the pink and black morphed into this grey, swirly, galactic design.

image (19)

This teal and red is so amazing up close. It is rich with jewel tones.

The chevron piece below was one I did without any ice. I painted it, scrunched it up and let it sit in the sun for awhile. Mom thought I should open it up for a bit and see what happens. Sure enough, the sun affected the wrinkles in the fabric, giving it even more texture.

image (18)

This piece below is my favourite of the day. Mom suggested that I try dyeing some sheer fabric I had just picked up at a fabric sale. I never would have thought to do this. So glad I did! The lovely sheer sea green was beautiful before but after covering it with ice cubes and sprinkling it with salmony coloured dye, it turned into a gorgeous shade of gold with some lovely marbling. Can’t wait to turn this piece into an infinity scarf.

image (18

We have been having a lot of fun with our fabric dyeing adventures. I received the teabag paper in the post today from Jackie Cardy! http://dogdaisychains.blogspot.ca/   I can’t wait to try and dye that!

Painting and dyeing fabric has always been a scary notion to me. Wellll, except when I wanted to bleach my jeans in the ’80s. And also when my daughter was little and needed “cobalt blue” tights for her choir recital. Seriously? Won’t “navy blue” do? (Camera-Cut to me boiling white tights in a pot on the stove with some RIT I bought at Safeway at 11:00 pm the night before.)

My Mother is brave. A piece of white fabric is a canvas to her. Brave and adventurous. And incredibly creative. I can’t wait to do a blog post on her and the amazing projects she has worked on.  Did I mention she has a great sense of humour, too? She still laughs about the book on dying. #dyeingnotdying

* i n t e r e s t i n g  f a c t *

My Mother used to dye wool back in the ’70s using all natural dyes like onion skin, carrot, teabags, etc. (that’s another blogpost)

Under the Big Top

Sometimes I look around my workroom and I see so many projects on the go and if I’m really ambitious, I work on several a day – feeling like a juggler in a circus. On a unicycle. On a high wire.

I think I may be *too* creative. I love the designing, the colour choices and the fabric picks. When I get started  I almost immediately get bored with the *doing* part….so I move on to planning something new. I don’t think I’m alone. In the crafting world we call those projects W.I.P.s (work in progress)

I thought I would share some of my W.I.P.s with you today. Some. There are too many to share them *all*

These are hexagon pincushions I am making for the Etsy Shop.

Great because they are easy and fairly quick.

I like fusing crochet with sewing.

image (18)

I ordered this vintage crochet dress pattern from Etsy. Took me quite a while to find the right metallic thread to couple with the bamboo/silk yarn. I made the left halter and then I hit a roadblock in the pattern. I really don’t understand it. There seems to be some steps missing. I think I will have to fudge it. But that roadblock made me move on to other projects for awhile. (queue circus music)


image (17)

I bought a few bags of leather scraps and I am jazzed to design some cuffs. I made this one yesterday.

image (19)

In anticipation of my family’s upcoming summer beach vacation, I started making some barefoot sandals for my daughter and me. This pair will be little flowers. I left it to make leather cuffs.

image (20)

I am working on vintage-inspired plush for the Etsy Shop. This will become a sweet hare with very long ears 🙂 I was using my pattern pieces to remember which part of the hare will be what fabric. After I chose the fabrics for this guy, I moved on to choosing fabrics for more hares.  Rather than just cutting out the pieces and sewing him together. It’s a problem, I know. It’s a circus in here.

image (22)

I couldn’t resist adding this awesome Barnum & Bailey poster. I may need to add geese, roosters and donkeys to my vintage plush. And clowns?

Barnum_&_Bailey_clowns_and_geese2

While I was gathering my W.I.P.s to photograph them for this post, I came across this. It’s a work in progress, isn’t it? This button has been waiting to be added to my favourite pair of Calvin Kleins for about 2 months.

image (23)

I may start plate-spinning all those antique plates I have hanging on the wall in my dining room!

Thanks for visiting my dog and pony show today!  Until next time, friends.

* i n t e r e s t i n g  f a c t *

“It is harder to get into the Ringling Brothers Clown School than Harvard Law School.”

cited from http://brenda-brendareevessturgis.blogspot.ca/2011/03/10-circus-facts.html

A Time for All Seasons

Today’s tea was English Breakfast with some French cream cookies. (Yes, 3 of them mmmm.)

image (4)

When I was little my Mother taught me to sew. I have taken on a few projects over the years and I really enjoy it. One day I will post about some of them. Although we have sewn together over the years, she only taught me how to quilt within the last couple of years. I started a project of four wall-hanging quilts – the seasons. Here in Canada, our seasons are very special. They offer dramatic changes, each with their own glorious attributes and they really do rule the lives of us mere humans living amongst Mother Nature’s amazing elements.

So far I have completed Winter and Autumn. I am currently working on Spring. I haven’t planned the Summer quilt yet…

WINTER

This is the Winter Quilt as it hangs above my front door. It is a snowy scene with a towering evergreen, like the ones I see out my front window. They stay “ever” green all winter.

image (5)

This is a close-up of the full moon. I painted the fabric to try and make it look more realistic. (My Mom loves to paint fabric and she has taken me out of my comfort zone about that. So glad she did!) Although this photo doesn’t do it justice, I used silver metallic thread to make the impact blasts we can see on the moon when it is full.

image (6)

I attempted to quilt the sky in a way to make it look like the Northern Lights we are so lucky to be able to see here in Canada.

image (7)

This bank of evergreens shown “further away” helps to give the scene some depth. Up close they are sweet.

image (8)

This is a close-up of the quilting I did on the large evergreen. I wanted it to be sort of three dimensional so I made (and quilted) the tree separately and attached it to the quilt so it would stand out and seem like it was standing on its own.

image (9)

This little fawn represents the deer and fawn we sometimes see in the creek by our home. My Mother shared some suede-like fabric with me from her stash for this little guy. His spots are made with French knots. The other photo here is the border where I tried to quilt “evergreen tree” style :0) I was inspired by Leah Day’s 365 Days of Free Motion Quilting. If you are a quilter, her blog is a MUST! You can find it here.

image (10)

AUTUMN

Here is the Autumn Quilt, including a close-up of one edge to show that I tried to keep the borders matching the part of the quilt it was next to.

image (11)

The little bushes are made with alpaca wool, quilted over top; the shrubs along the water  were thread-painted and the fabric for the water was painted first to give it a more realistic appearance, then quilted with ripples in it because of those Canada Geese. The Autumn leaves were made separately and put on the quit to give it a three dimensional look of falling leaves.

image (12) image (13)

Here shows a photo of the tree from the back of the quilt as well as a close-up of my favourite part – the knot – which was free motion quilted in. Also shown here is the sleeve at the top of the back so it can be hung from a rod.

image (14)

SPRING

Now here is my Spring Quilt in progress; much more impressionistic. I know what you’re thinking. It just needs a headless horseman riding off in the distance! After I appliquéd  the tree on I was worried it looked more like a Halloween Quilt, but I will be adding faint pink and white cherry blossom petals all over the tree. Hopefully that will soften it up.

image (15)

The sky was painted using my new favourite thing – Shiva Paint Sticks! It was the perfect thing to be able to use blue and yellow and not get greeeeen. The idea of the style of painting I did was to make it “burst” with colour and life (like Spring) and to try and create some lighting effects.

image (16)

I left my edges raw for the swirls in the water. But if you look at it closely you see the threads are fraying. I was going to treat them so they wouldn’t fray when, online, I came upon Rhianon Taylor and her Viking Long Boat Quilt. Eeee! It is amazing! She introduced a wonderful idea of embroidery around the edges, which I am attempting for my water pieces. You can find her here.

You can see how effective it is with covering up the fraying edges and also adding dimension, which I really love to do in my quilting.

I will update as I go along with this quilt. I have my work cut out for me when it comes time to add all those petals to the tree…..

Thanks for spending some time with me and my quilts! Until next time…

* i n t e r e s t i n g  f a c t *

“In Svalbard, an island off Norway, the sun doesn’t set from April 19th until August 23rd and the sun doesn’t rise from October 26 until February 15th!”

cited: http://www.ransborons.scoilnet.ie/blog/?p=2818

New Kid on the Block(ing)

How are things today? Here in my corner of the world the weather has been extreme. Highest humidex ever recorded with temperatures nearing 40 degrees Celsius. Thankfully, it cooled off overnight so the hot tea I am enjoying while talking to you is quite tolerable. My favourite tea lately is Mojito… 

Image


Today I wanted to share with you crocheters (and knitters and tatters) about my Aha! moment (as Oprah would say) with my love of crochet. I started crocheting when I was expecting my son almost 17 years ago. My Nana was a crocheter and so was my Mother-in-Law. I wanted to learn so I could make things for my new baby. So, my friend and I registered for a 2 hour evening class at our local craft store. I picked it up very quickly and have loved it ever since. I am not afraid of a challenge, so I started off with a (huge) granny-square afghan. As my belly grew during that pregnancy, so did the pile of granny squares.

I just kept making more and more squares. I eventually put the squares together into an afghan that we still have today, but it pretty much fell apart…. 

Image


I have gotten better over the years (as my son has grown to be 6’2) and took on even more challenging projects. I read about “blocking” in some patterns and … you know how it is … you read it, you don’t really know what it is, but you know how to do everything else, so you just ignore it. Kind of like how I cook!

Until just the other day. I tripped over the blog of Doris Chan. She is a renowned crochet designer and her blog is really informative (and funny!). She wrote about blocking; and she did it in such a way as I didn’t feel intimidated by it and I could see clearly that it made ALL the difference in how the finished piece looks. So, I tried it….. and Aha! I see now.

I am making some lacy crocheted rings and bracelets for my Etsy Shop. They are made with Size 10 crochet thread and small hooks (size 2 – 3.25 mm).

Image

You can see here on the unblocked piece on the left that the stitches are unruly and don’t look tidy. The blocked piece on the right looks more “finished” and lies flat. You can also see the delicate designs of the picot stitches and flower much more clearly. I am TOTALLY into blocking now. If you are interested, Doris gives an excellent how-to on her blog in the post “Blocking is Your Friend” which you can find here.

Have you had an Aha! Moment in crochet, or other fibre arts? Share with us!

* i n t e r e s t i n g  f a c t *

“Queen Victoria of England (1837-1901) crocheted and contributed to the craft’s early popularity.”

cited: http://www.jjcrochet.com/blog/all-about-crochet


pull up a chair

As you pull up a chair to read this… guess what? This post is about a chair! (hehe) But not just any chair. Are you on the edge of your seat? (I’m here all week….try the veal!)

Knowing I was going to be out of work soon,  I set-up a sewing room/studio/office that I could move into once the big day came. I went totally shabby chic and it is still a work in progress. (Darling Husband has a shelf to hang for my teapot collection and I need to paint my vintage brass chandelier and hang it – that’s another blog post) But what was I supposed to sit on? I couldn’t put an ugly office chair in that pretty room. And an over-the-top French Provencal chair wouldn’t be practical. So, I looked around the house for something that I could “re-do” and sure enough – I found something.

I bought this chair at a garage sale wayyy back when I didn’t know shabby chic was a “thing”. I liked it because it was white and adorable and would suit my daughter’s room just perfectly at the time. It was covered with a sort of vinyl – that you might find on outdoor furniture. Good for little kids – wiped up and washed off easily. She grew up and flew the nest. I decided to re-cover it.

Now, don’t think I know *anything* about re-covering furniture, because I don’t. I have never done it. But I am industrious. So…. I dug out some pretty fabric my Mother bought me, armed myself with a staple gun, hot glue gun and some attractive rivets. I took the seat and the back off, recovered them, with some thick quilt batting for comfort and VOILA! My new shabby chic sewing room/studio/office chair. (I really need to come up with a good name for that room.)

I wish I had *before* pictures, but I wasn’t thinking I would be blogging this when I started out with this project.

IMG_9889


I used two pieces of fabric for the back. I wrapped the front and hot-glued it in place around the back. I then took another piece of the floral fabric and cut a piece for the backing, folding the edges under like a seam and staple-gunned it down. I used pretty rivets all the way around to cover the staples. It was a bit tricky to attach back onto the chair frame. (gravity, grrr)


IMG_9891

IMG_9893


The seat was quite simple. The pattern of the fabric was forgiving (didn’t need to line anything up) so I just hot-glued the quilt batting to the seat, covered it with fabric and hot-glued in a few places to keep it down. I then used a simple fabric to act as a nice finishing piece underneath and staple-gunned it over top of the edge of the floral fabric, using the same “hem” method as the back piece of the chair above. Gives it a nice, tidy edge.

IMG_9892

IMG_9894


And here it is, as it sits right now, in my sewing room/studio/office while I write this. (As you can also see, I must add “hanging the blind” to Darling Husband’s Honey-Do List…)


shabbychair

It was a fun project and for those of you who like to finish something the same day you start it, this is the perfect thing!

Until next time! Thanks for visiting :o)

*i n t e r e s t i n g   f a c t*

“One of the earliest innovators of the modern office chair was Charles Darwin who added wheels to his chair so that he could get to his specimens quickly while in his study.”

http://www.desksinc-ut.com/fun-furniture-facts.php


sea change

Hi there! Thanks for visiting my blog. I’m Paula. I live in Edmonton, the capital city of Alberta in Western Canada. I have been quite busy these last two weeks setting up my new “identity” online with an Etsy Shop, this blog and all the social media that follows (and GETS followed #fingerscrossed). I am getting the lay of the land and am super excited to begin sharing with you.

There has been a sea change in my life. After eleven years at my job – and never being out of work  since my last maternity leave 16 years ago, I was recently laid off. I knew it was coming and did all I could to prepare. A few interviews here and there, but no bites. I am a very creative soul. I thought a lot about people complimenting me on my hobbies over the years and telling me how talented I am, and knowing that when I do those creative things it brings me peace and happiness….maybe I could try and sell some of my work…. My Etsy shop is setup and now I have to populate it with charming things to sell.

My goal with this blog is to share with you some of the projects I have on the go – which is always something all of the time and quite varied. I love to crochet, quilt, sew, paint and other crafty stuff. I really love photography, which will be a good tool for me to use to share projects with you.

I encourage you to interact; comment; let me know what you are working on, etc. Let’s share – I would love for this blog to be a nice back-and-forth with good folk like you and if we can inspire each other, we have made the world a better place. I look forward to getting to know you and sharing more about myself along the way.

Here is a sample of my work. This is my amazing daughter, Sam, who is wearing a scarf I made for her a few months back when the Canadian Winter was still hanging on… It is crocheted with sunflower yellow and multi-sized red buttons.

397478_10152470819480424_46865527_n

Thanks for visiting and I hope we can inspire together!

See you next time!

xo Paula

Squirrel Picnic

Handmade with Love and Stuff

craftyOgo

Unusual Gift Ideas with beads and yarn

Lisa in Port Hope

Quilting, sewing, and fun about town

Life takes a turn

My life is upside down, but I can still sew straight

simplydaisies

Simply living this rollercoaster of life!

Granny's adventures and musings

Sharing my life and thoughts with you

The Bright Blooms

Dressmaking and living colourfully in London

Ruthie quilts! And quilts...

Just another WordPress.com weblog

Off The Hook Crochets

Beautiful Handmade Crochet Products

i'llshootyou

Hi. Call me Diana.

Style Wise

This WordPress.com site is the bee's knees